Your cart is currently empty!
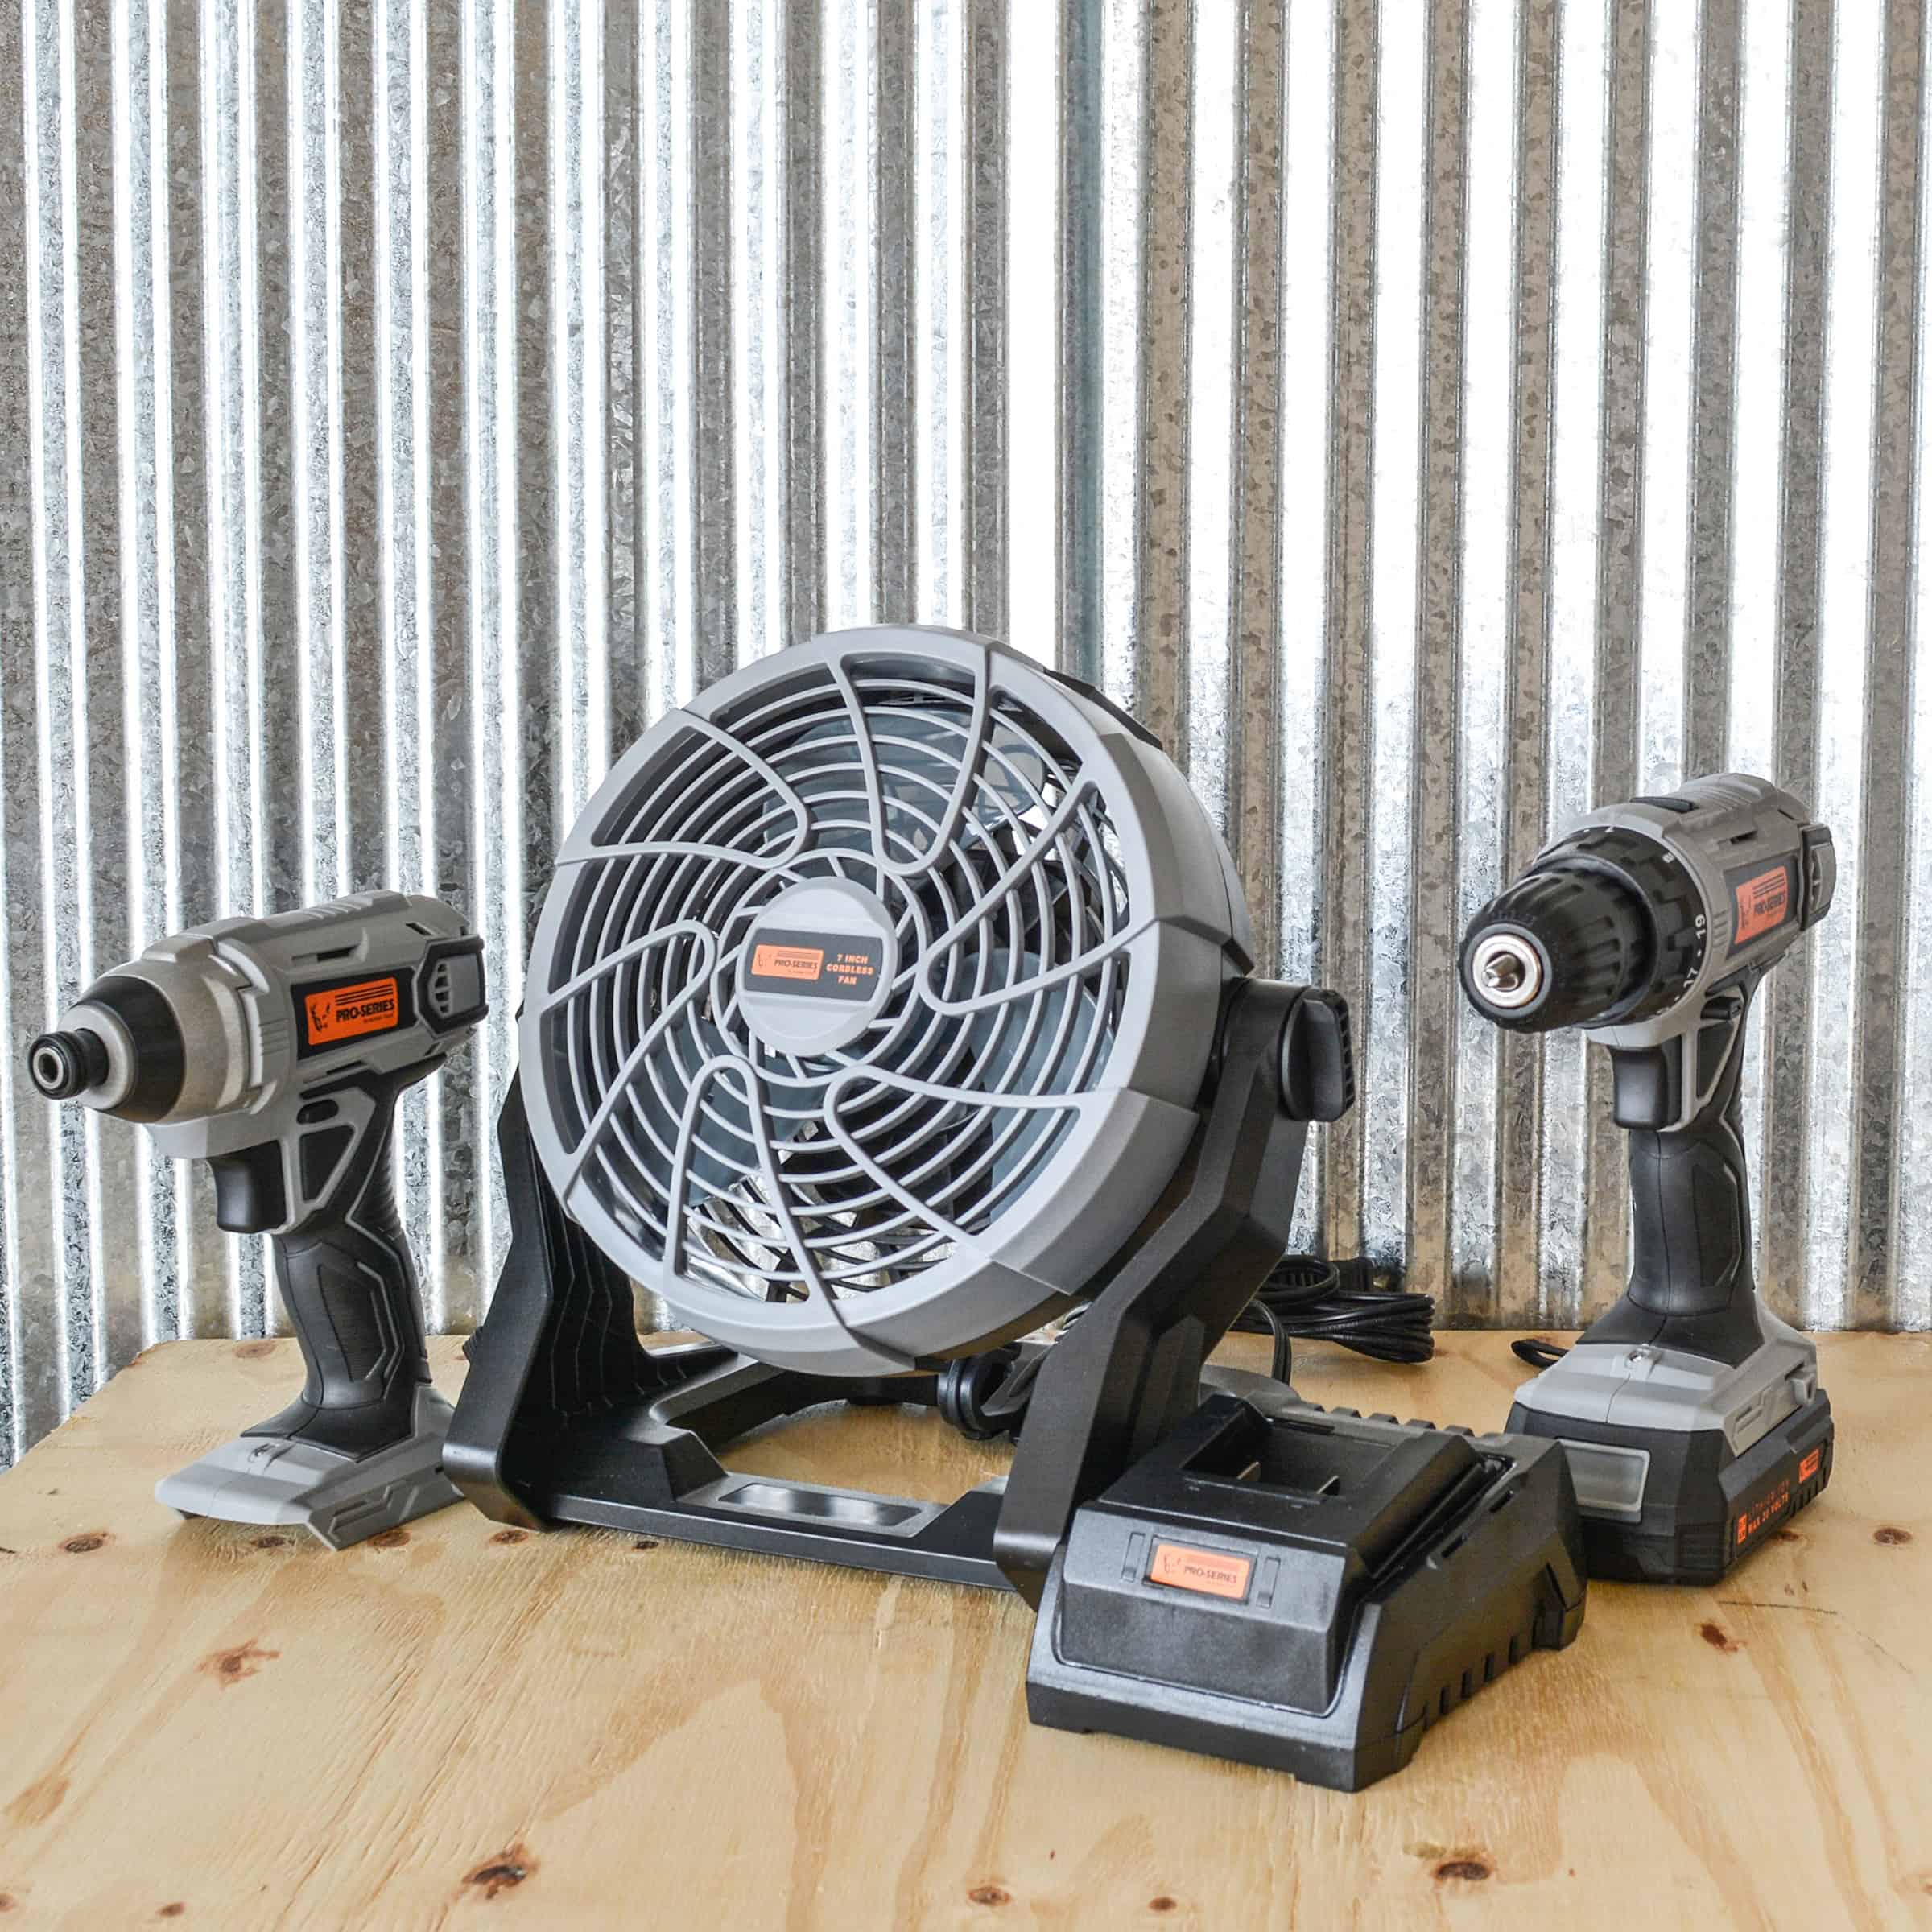

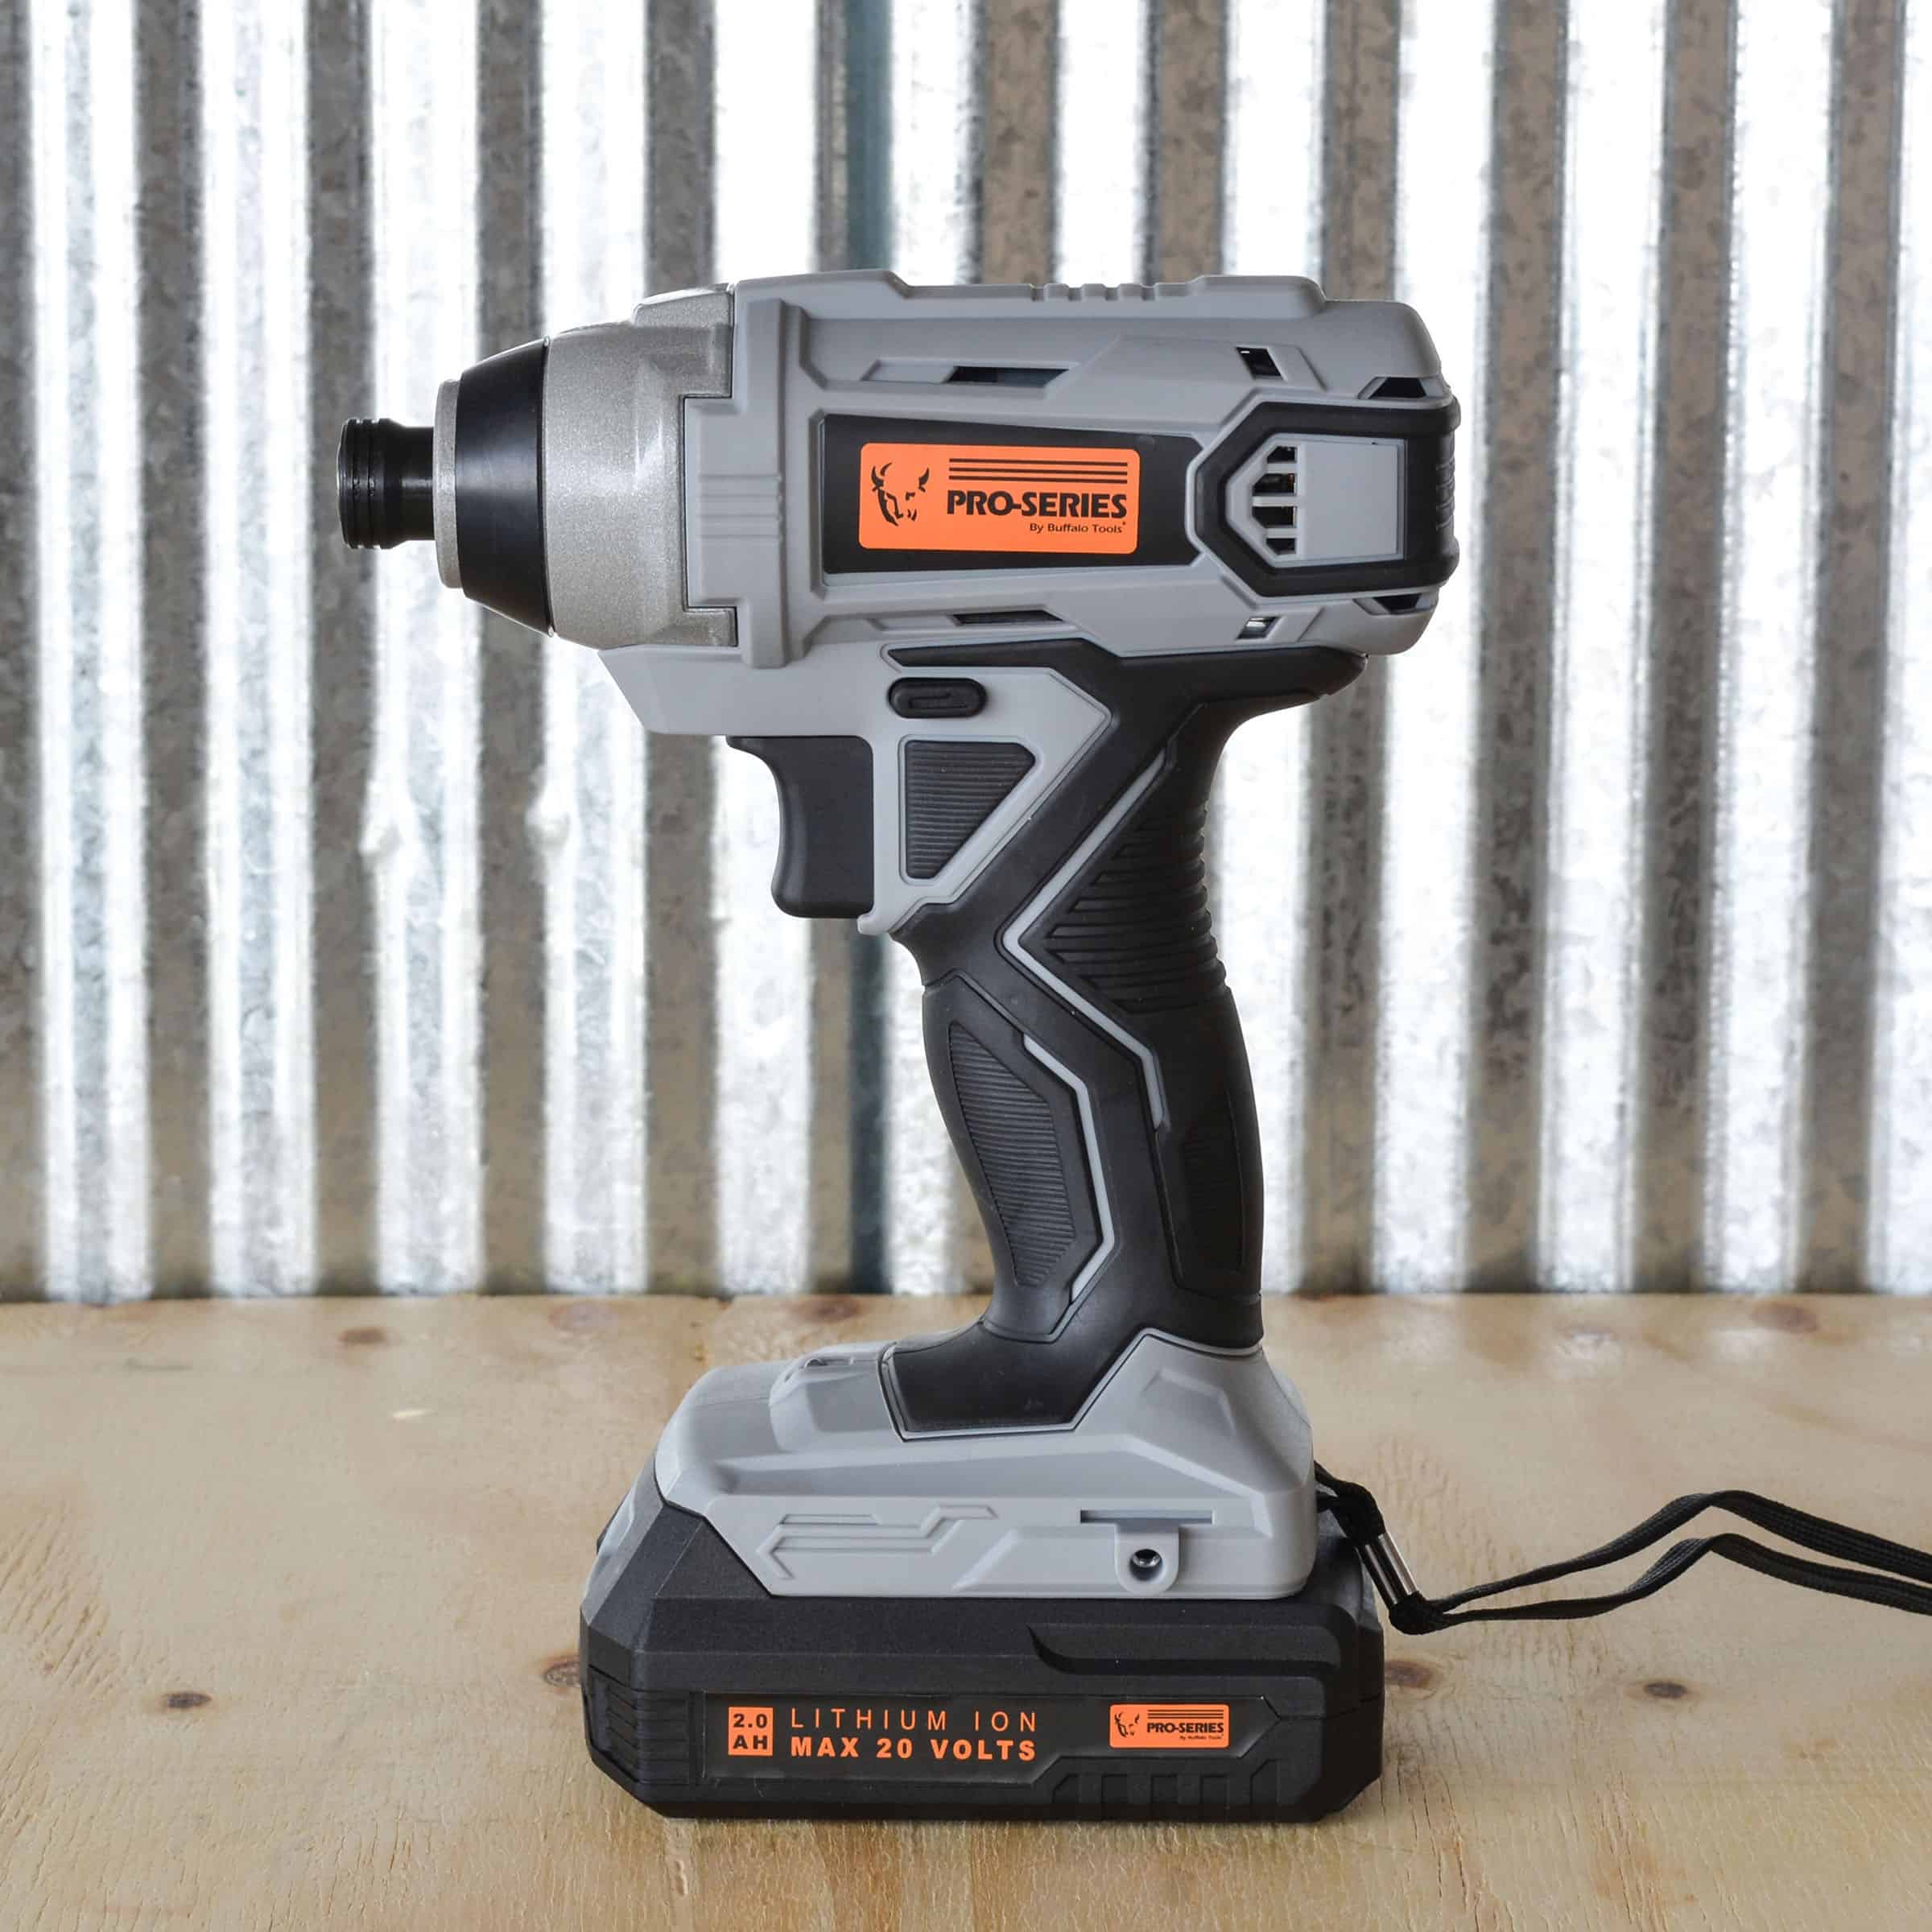

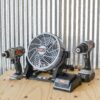
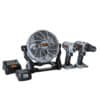
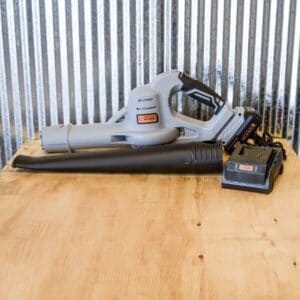
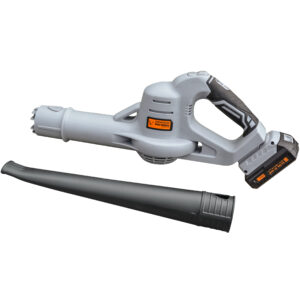
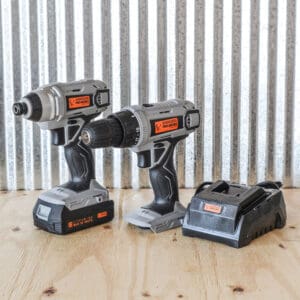
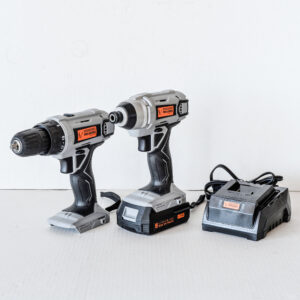
Cordless Power Tools 5 Piece Combo Kit Drill/Fan/Impact Driver – Pro Series
$114.99
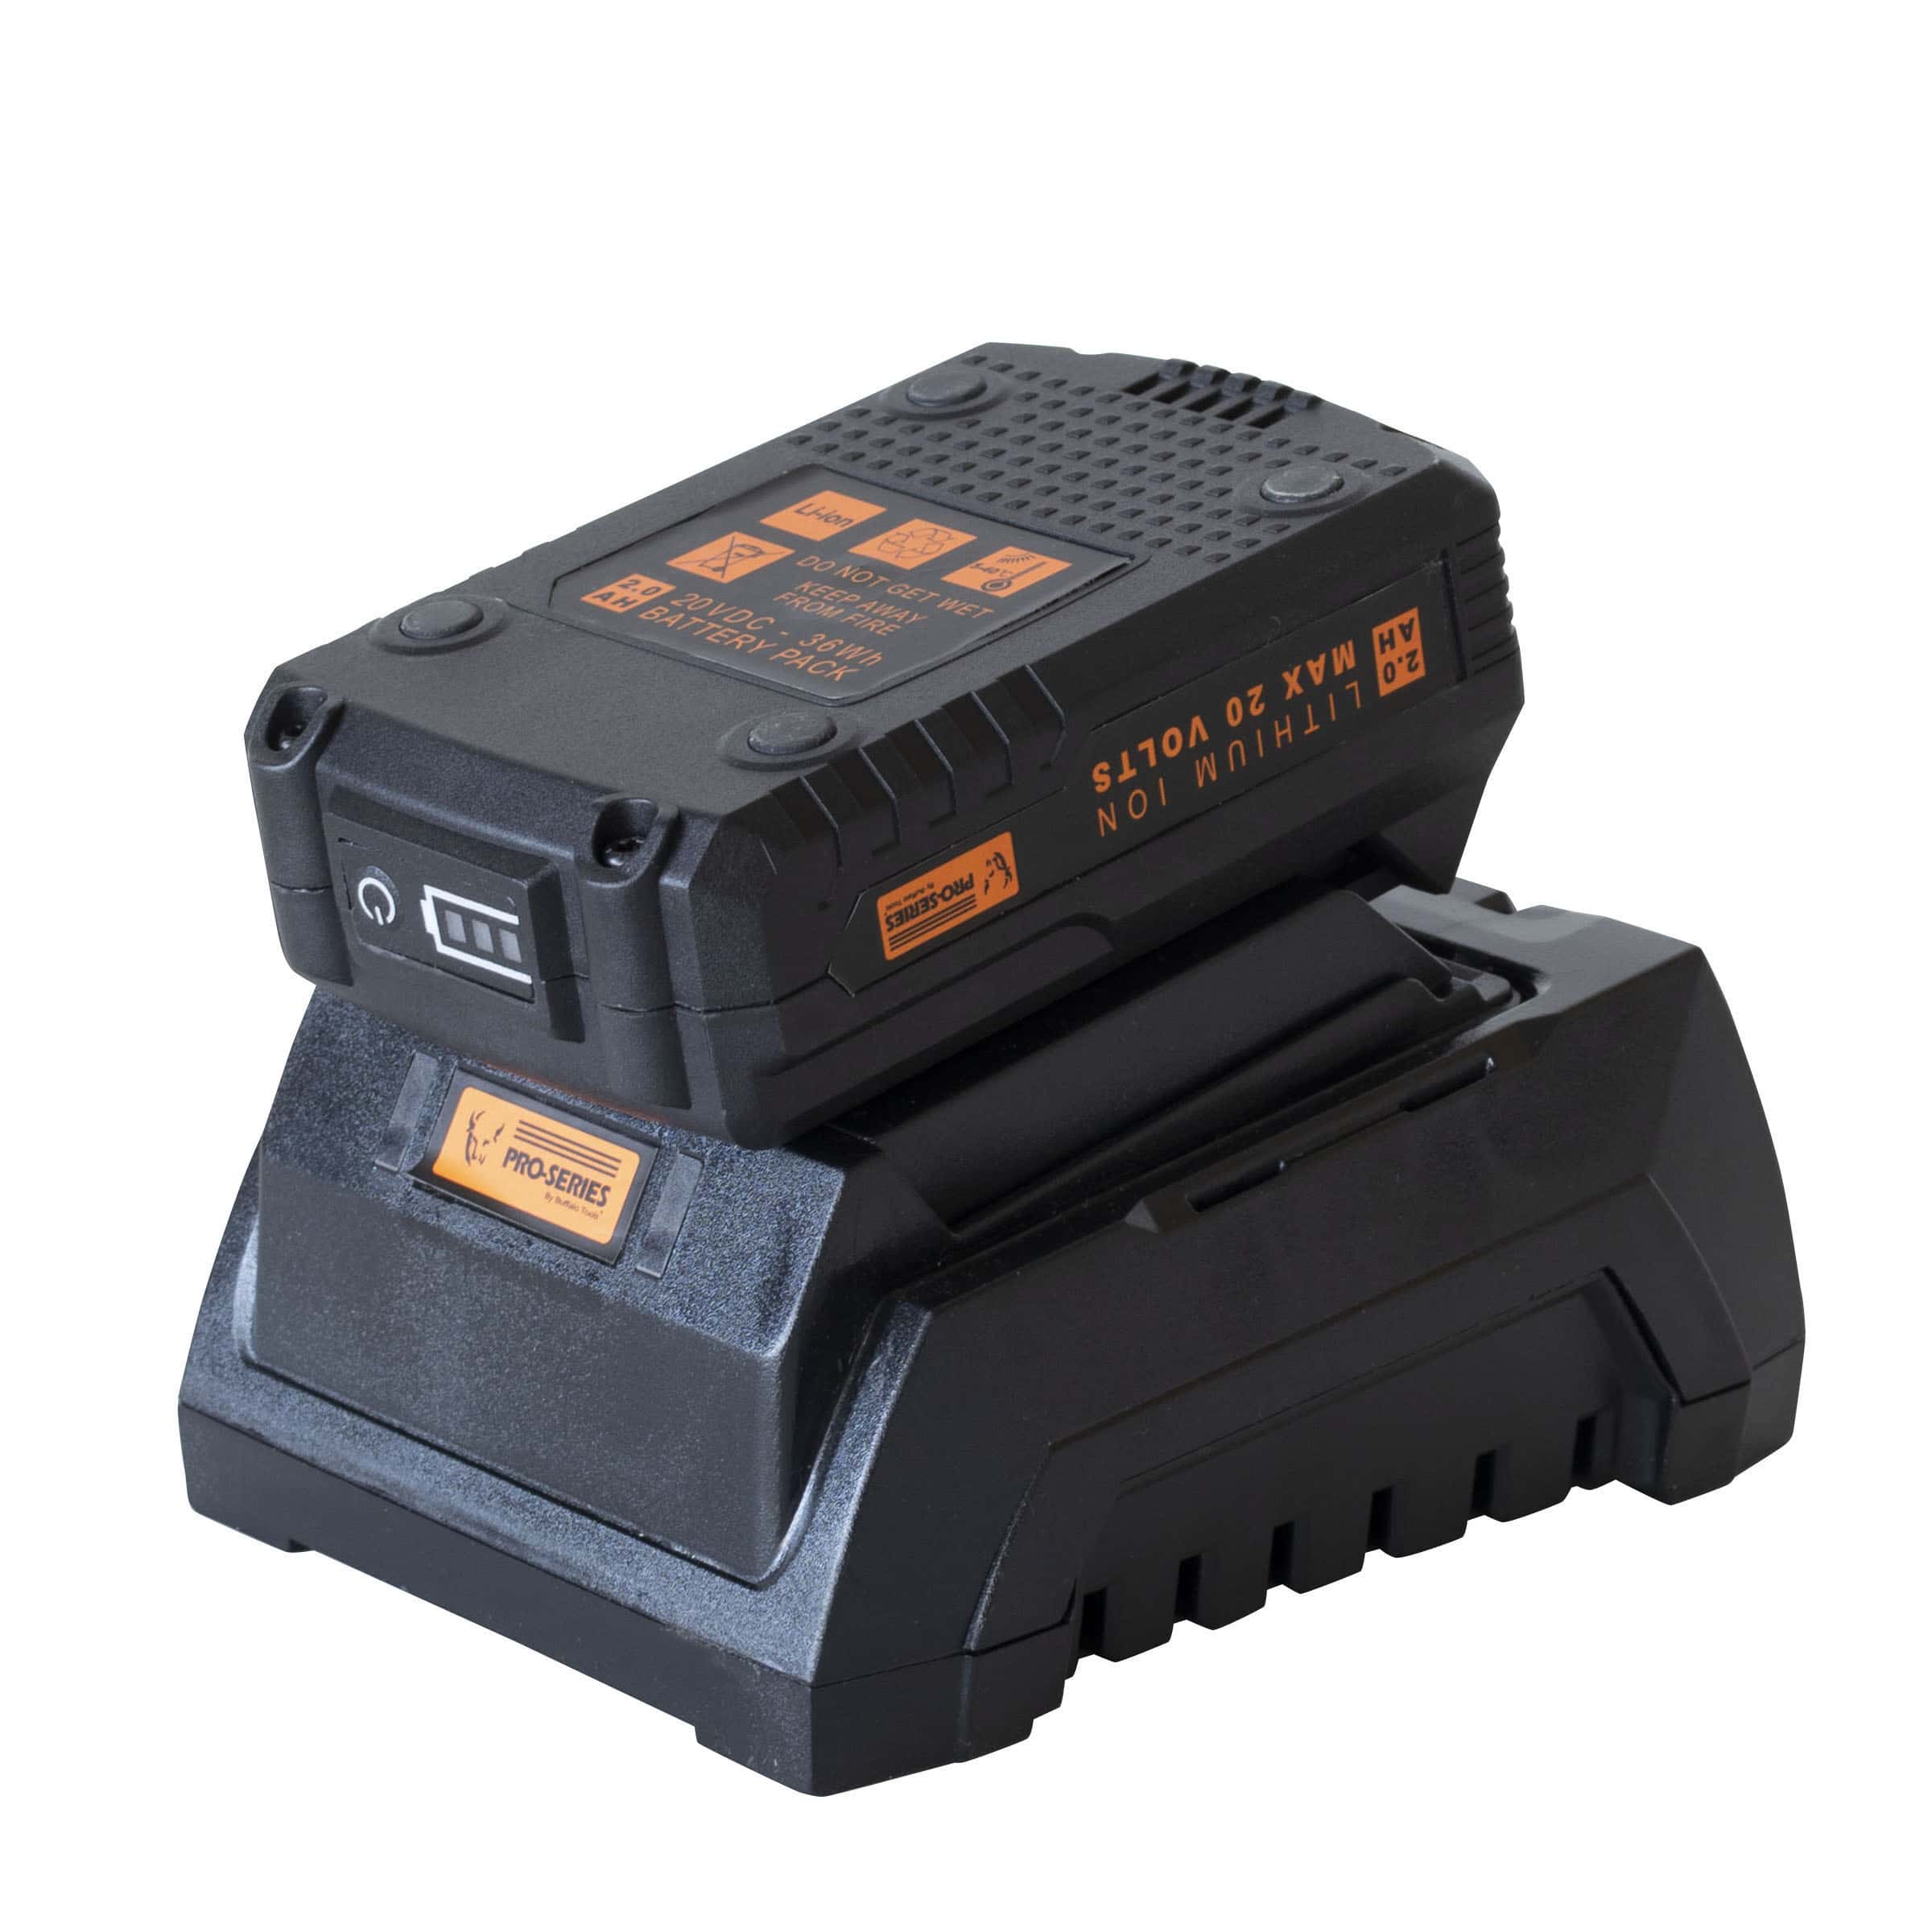
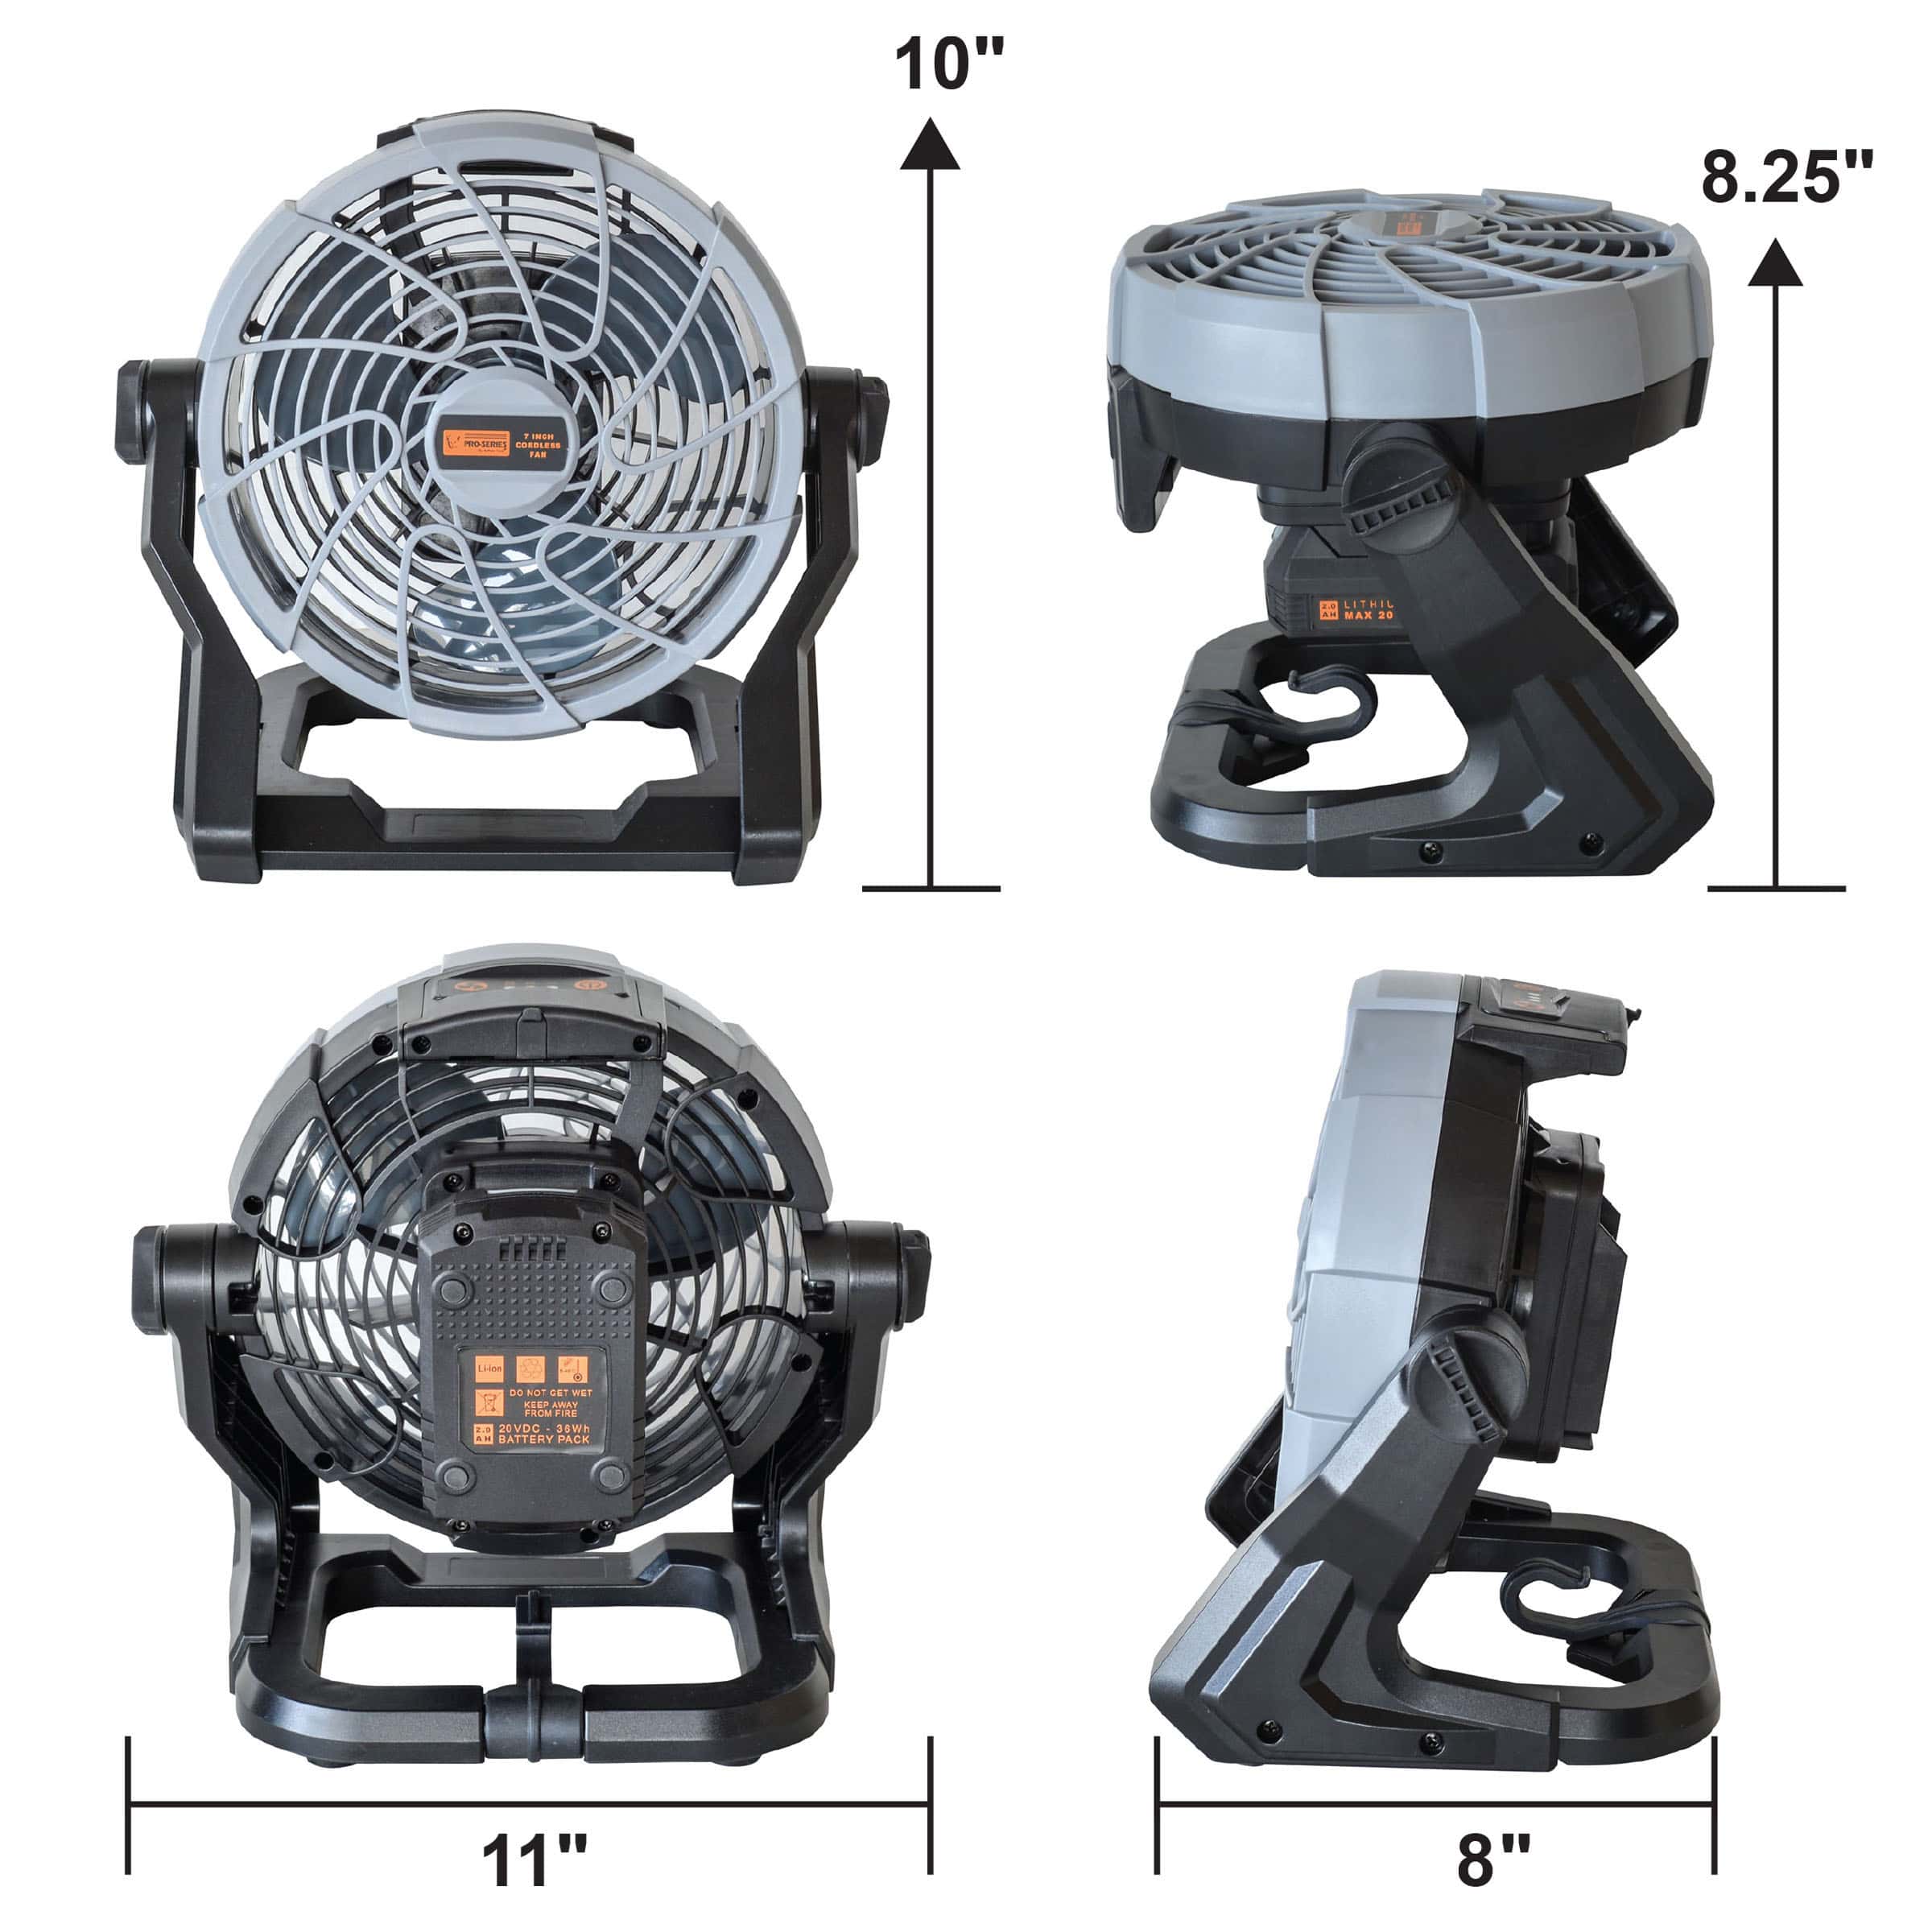
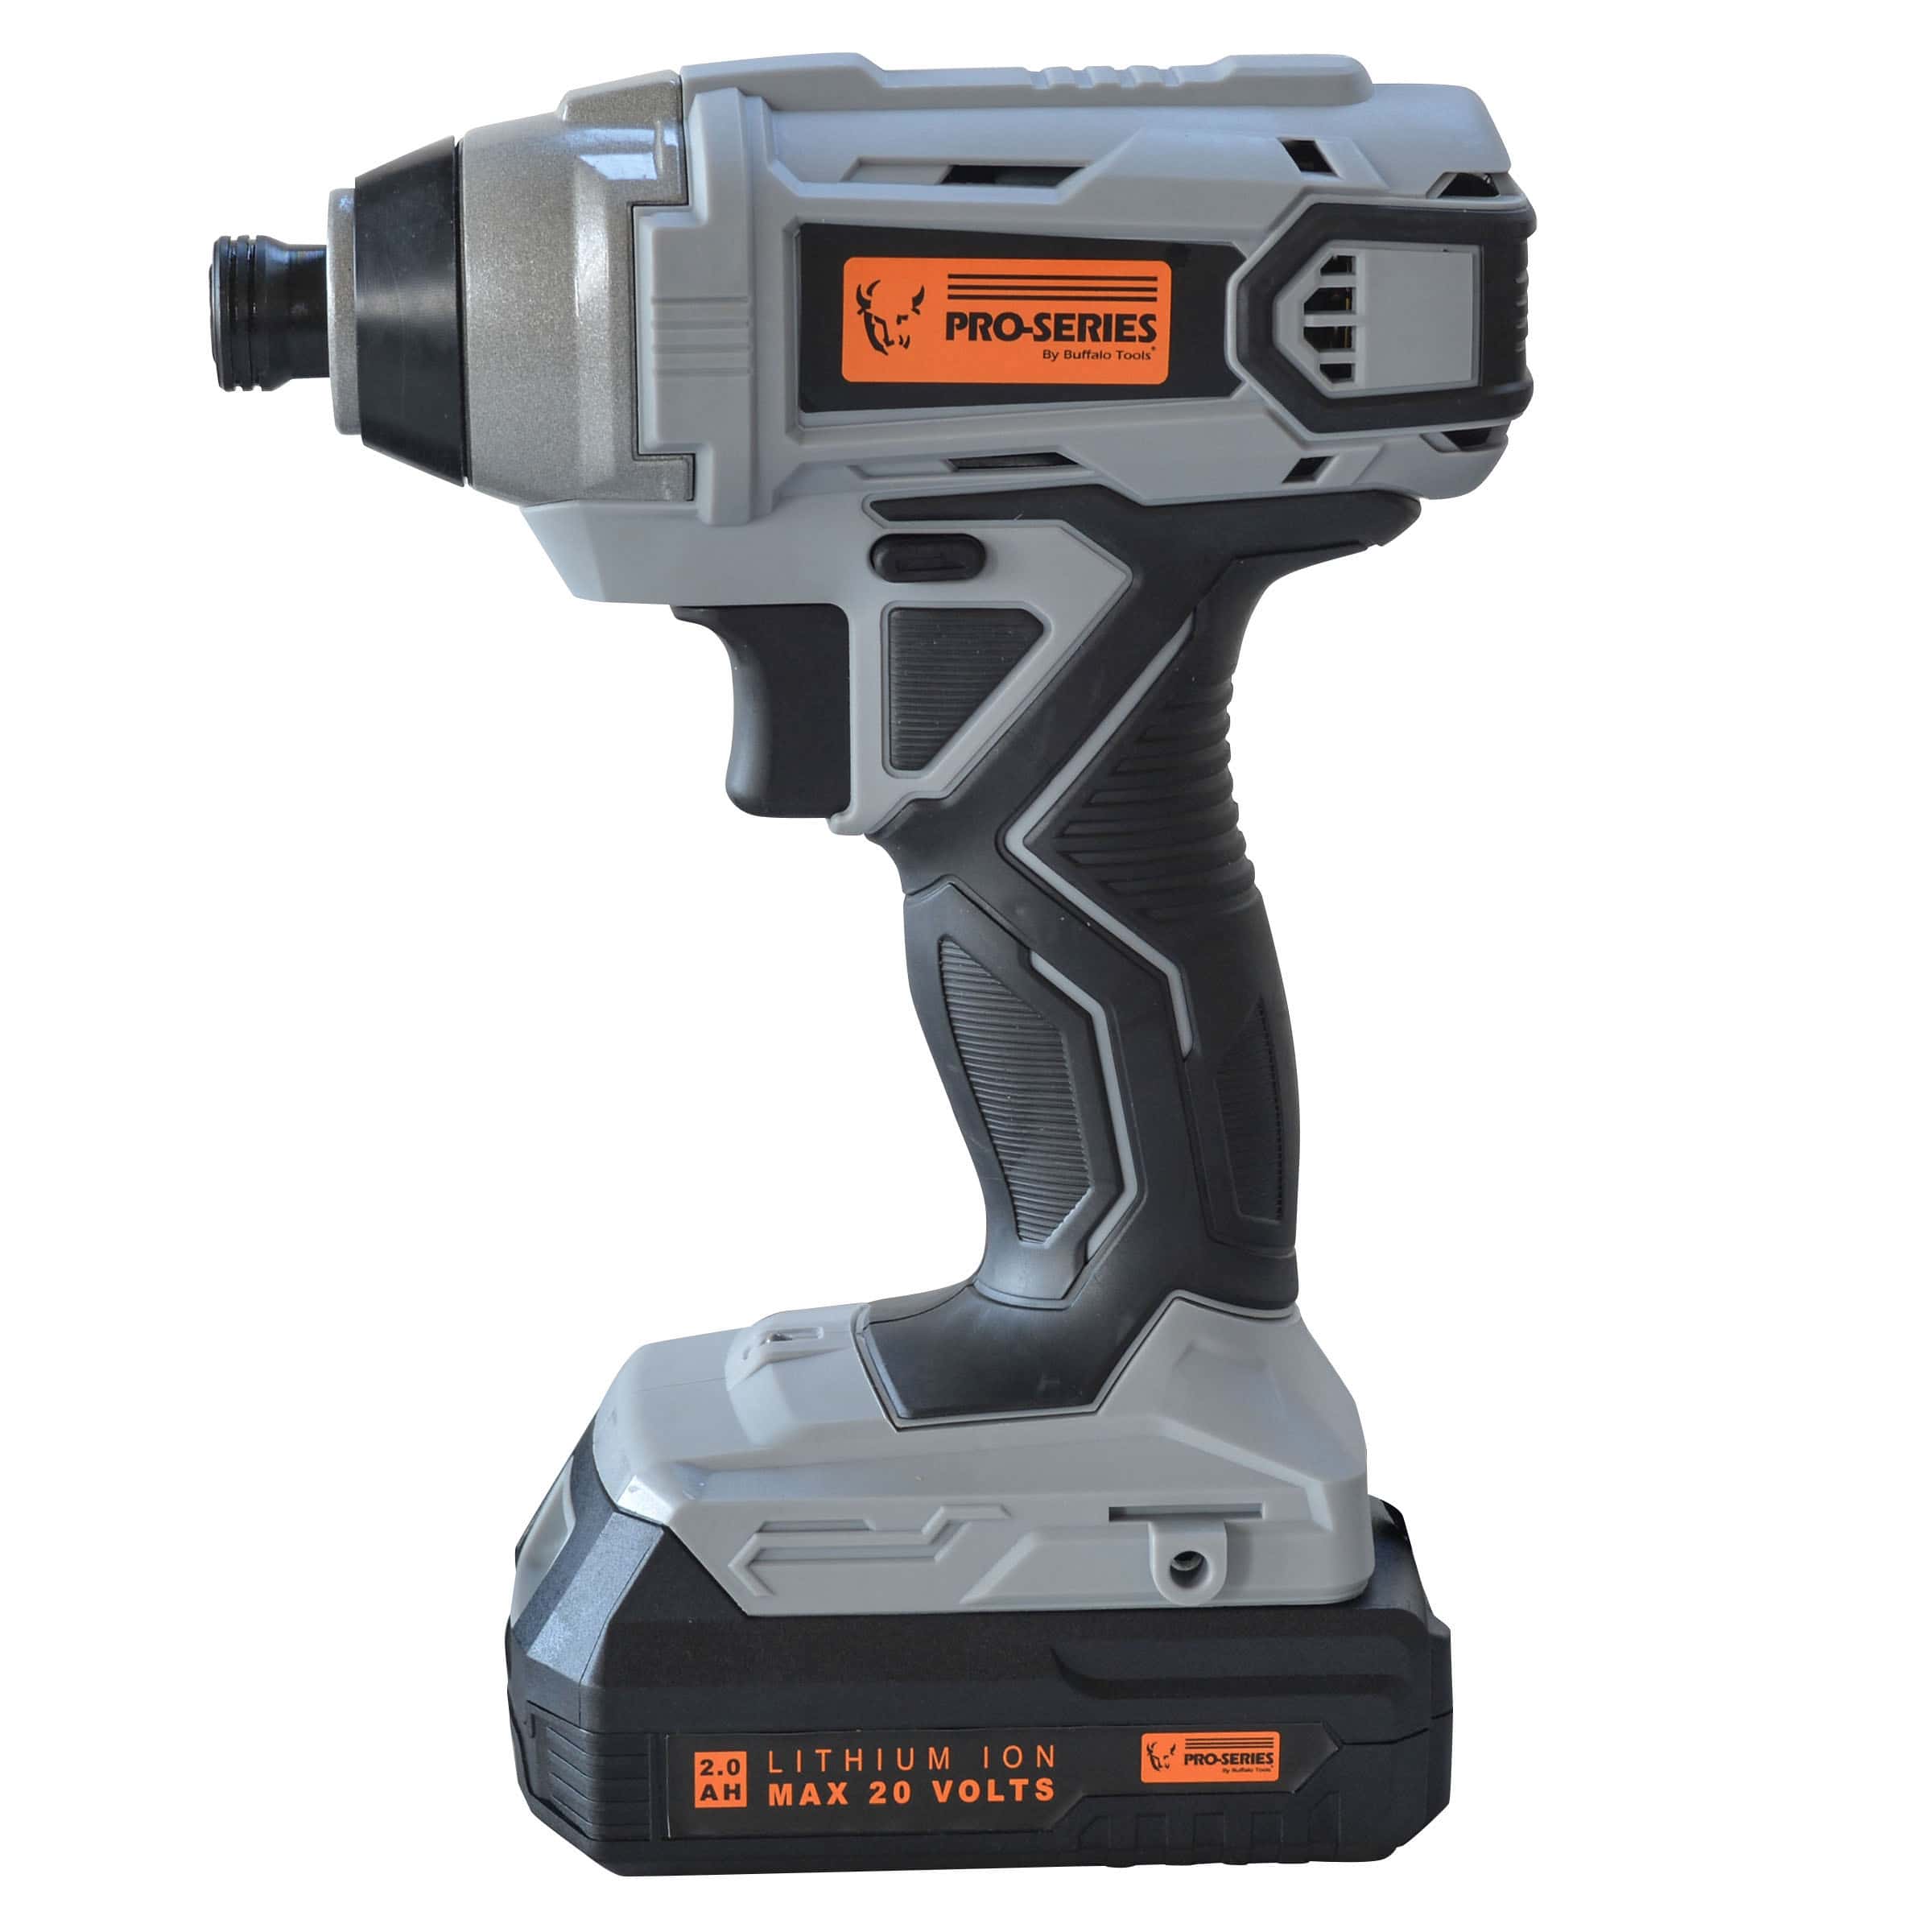
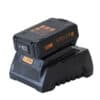
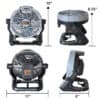
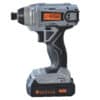
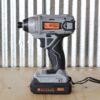
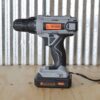
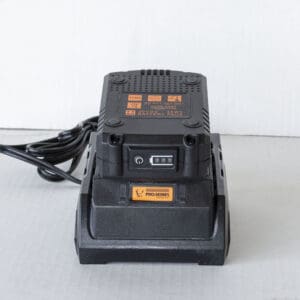
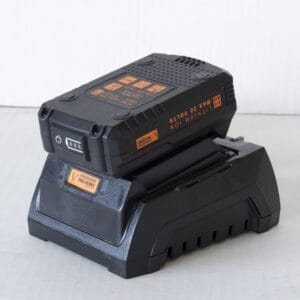
| 3/8 inch Cordless Drill: Variable 2-speed drill 550-1,700 RPM LED light on base illuminates the work area Keyless chuck for one handed bit change Lightweight and ergonomic handle, with belt clip and handle strap 250 inch/pounds of torque 19 plus 1 torque settings Forward/reverse switch Drill weighs 2.8 lbs, 2.0 lbs without battery Drill measures: 8.75 H x 3W x 8.0L1/4 inch cordless Impact Driver: Variable speed control Forward/reverse rotation and lock control LED light on base illuminates the work area Keyless chuck for one handed bit change Lightweight and ergonomic handle, with belt clip and handle strap Max torque 110Nm, no-load speed 0-2600/min, impact rate 0-3400t/min Drive weights 2,7 lbs, 1.8 lbs without battery Driver measures: 8.75 H x 3W x 6.5LCordless Fan: Hangable design with hook on base of fan Fan head swivels up and down 90 degrees Run time up to 5 hours 3 speed fan with push button settings Air Volume 180 CFM/240 CFM/270 CFM Rated Speed 1200 RPM / 1500 RPM / 1700 RPM Fan blade measures 7 inches wide Fan measures 11W x 10H x 8D inches overall Fan weighs 2.15 lbs, 1.3 lbs without batteryBattery and Charger: Quick charger can fully charge 20V battery in 60 minutes Charger voltage 100-240V, 50-60Hz, 60W, 2.3A, 2.0A charging current Battery rated voltage 20V (Li-ion battery) 5 ft power cord on charging base Battery weighs 13.2 oz, charger weighs 13.6 oz, combined weight 1.66 lbs Battery charge combo measures 4.5H x 4.25W x 5.5D inches |
10 in stock
-
Description
I recommend the 5 Piece Cordless Combo Kit. First of all, I know it includes the most popular tools I need! For example, the kit includes a 3/8 inch Drill and a 1/4 inch Impact Driver. Also, it includes a 3-Speed Cordless Fan. Plus, a 20V Lithium Ion Rechargeable Battery and Charger Set are included. I use this set to complete a range of projects on the job site or around the house.
There are so many features shared by the 5 Piece Cordless Combo Kit. It includes 20 Volt Drill and Driver Set with a keyless chuck to make changing bits easy. Plus I like the LED on the base because it helps illuminate the work area. In addition, I like the compact, lightweight and ergonomic handles with belt clips. Finally, I use the straps on the handle.
Particularly, the variable two-speed 3/8 inch Cordless Drill features a keyless chuck. In fact, it features 250 lbs of torque, a forward and reverse switch and 19 plus 1 torque settings. The 1/4 inch Cordless Impact Driver features variable speed. Also, I like the lock control and the max torque of 110Nm. In addition, I use the quick charge base to fully charge the 20 Volt Lithium Ion Battery in just an hour.
I know the Pro-Series 3-Speed Cordless Fan can be set up anywhere to keep the air moving and the area cooler. That is why I love the 3 speed fan head. I swivel it up and down. Plus, I use the hook on the base to hang it. Also, I know the Lithium ion battery-operated fan can move up to 270 CFM of air on the highest setting.Item # LIDDFKIT20
Using an electric drill is a straightforward process. In detail, here’s a step-by-step guide on how I use the set.
- First, I select the appropriate drill bit. I determine the type and size of drill bit required for your specific task. For example, common types include twist bits for general drilling. I use spade bits for larger holes, and masonry bits for drilling into concrete or stone.
- Secondly, I prepare the drill. I ensure the drill is in good working condition and the battery or power cord is properly connected.
- Adjust the drill settings: I set the speed and torque according to the material I am drilling into. I use lower speeds are suitable for harder materials. Then, I use higher speeds for softer materials.
- Secure the workpiece: I will always secure the workpiece using clamps or a vice. I know this helps prevent it from moving during drilling. Obviously, I know it also ensures accuracy and safety.
- I will make certain to grip the drill correctly. First, I hold the drill with one hand on the handle and the other hand on the front of the drill, near the chuck. Maintain a firm grip while keeping your fingers away from the moving parts.
- Align the drill bit: I position the tip of the drill bit precisely on the spot where I want to drill. Then I use a pencil or marker to mark the drilling point if necessary.
- Apply gentle pressure: I will apply steady, even pressure to the drill as I start the drilling process. Next, I will let the drill do the work and avoid exerting excessive force. Otherwise, this can damage the bit or cause the drill to slip.
- Start drilling: I press the trigger or power button to activate the drill. Next, I drill slowly to create a small indentation in the material. Once the indentation is formed, I increase the speed gradually and continue drilling.
- Maintain control: I keep the drill perpendicular to the surface to ensure straight holes. Next, I will maintain a steady hand and avoid tilting or angling the drill, which can cause the bit to bind or break.
- Clear debris. Periodically, I will stop drilling to clear away debris and dust from the hole. Overall, I do this by withdrawing the drill slightly or using a blower or brush.
- Next, I finish drilling. I will continue drilling until the desired depth is reached or the hole is complete. Once it is complete, I release the trigger or power button to stop the drill.
- Finally, I remove the drill bit. Once I complete the job, I turn off the drill. Then I carefully remove the drill bit from the chuck.
Using cordless power tools offers several advantages compared to their corded counterparts. I share some key benefits:
First, I use cordless power tools to provide me with greater mobility and flexibility. I can easily move around different job sites without the need for extension cords.
Also, cordless tools eliminate the hassle of dealing with cords. As a result, I don’t get them tangled, and they don’t get in the way of my work. Best of all, I can reach hard-to-reach spaces without a cord.
I appreciate another great advantage: when I own cordless tools I eliminate the risk of tripping or getting entangled in cords.
Next, I like my cordless power tools because they don’t require me to find a power outlet or unravel cords. Obviously, this means I will start working faster! I pack my tools in one bag for easy access.
Finally, I use cordless power tools to tackle various tasks with a single battery platform. In addition, I use the same interchangeable battery for this collection of tools.
You may also like…
-
Pro-Series

Cordless Leaf Blower with 20V Lithium Ion Battery and Charger – Pro-Series
In Stock Soon$64.99 -
Pro-Series
20v Lithium Ion Battery and Charger – Pro-Series
Add to cart$53.99 -
Pro-Series
Cordless Drill/Impact Driver Combo Kit – Pro-Series
In Stock Soon$82.99 -
Pro-Series
Cordless Digital Inflator Kit with 20V Lithium Ion Rechargeable Battery and Charger – Pro-Series
Add to cart$92.99
Related products
-
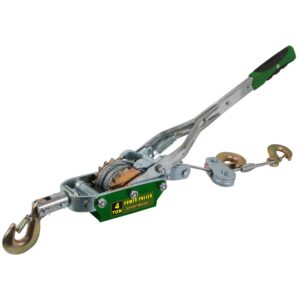
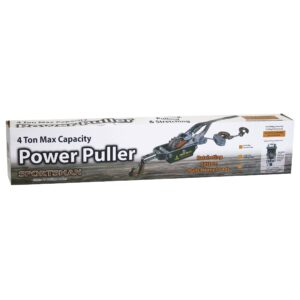
Sportsman
4 Ton Power Puller – Sportsman Series
Add to cart$59.99 -
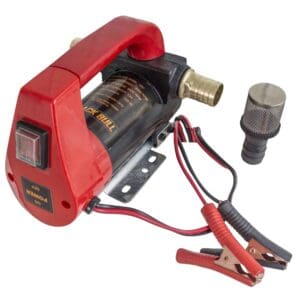
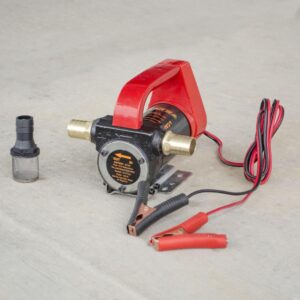
Black Bull
10 GPH High Flow Rate 12 Volt Portable 155 Watts Diesel Oil Pump – Black Bull
Add to cart$49.99 -
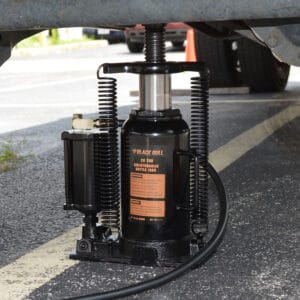
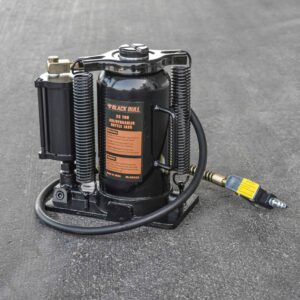
Black Bull
20 Ton Air Hydraulic Bottle Jack with Manual Hand Pump – Black Bull
Add to cart$119.99 -
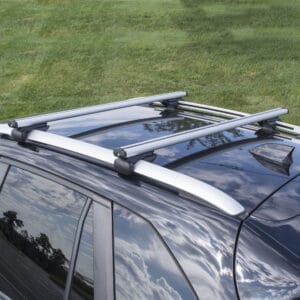
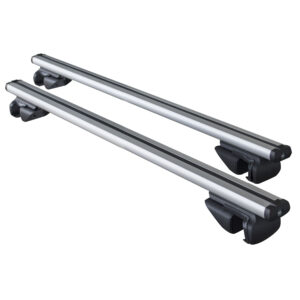
Pro-Series
47 in. Universal Aluminum Roof Bar For Small SUVs, Set of 2
In Stock Soon$59.99